Build a requirement template
PRESENTATION
This tutorial aims to show you how to build a requirement template from scratch.
Prerequisites
- Have a model to generate textual requirements.
News skills that you will acquire
On Designer:
- Select a Requirement template,
- Reuse an existing Requirement template,
- Generate Requirements,
- Create and use a personnal Requirement template.
Duration
2h
INTRODUCTION
For this tutorial, we will use a model available by default and built to test a requirement template.
Load the test model
First, you'll have to load this model.
-
Click on File > New > Example...
-
In category Sim4Sys Model Examples, Select Sim4Sys - Common
-
Click on Next
-
Select RequirementGeneration
-
Click on Finish
Load an existing template
In this tutorial, we will describe the process to begin a requirement template from scratch but you can find a set of full templates to modify by yourself in the Example section.
To load an existing requirement template, proceed as follow:
-
Click on File > New > Example...
-
In category Sim4Sys Requirement Templates, Select Sim4Sys - Requirement Templates
-
Select the container project (e.g RequirementGeneration that you just created).
-
Name the file to create. The extension should be .reqst.
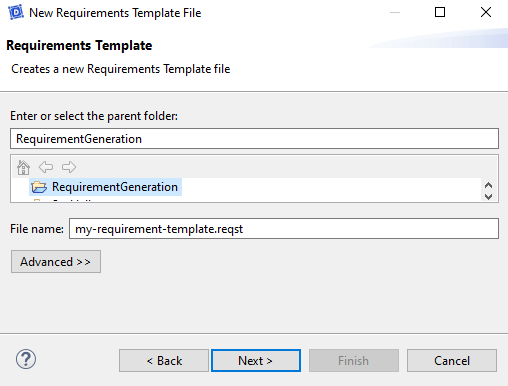
-
Click on Next
-
Select Feature Standard Template File. Feel free to test another one.
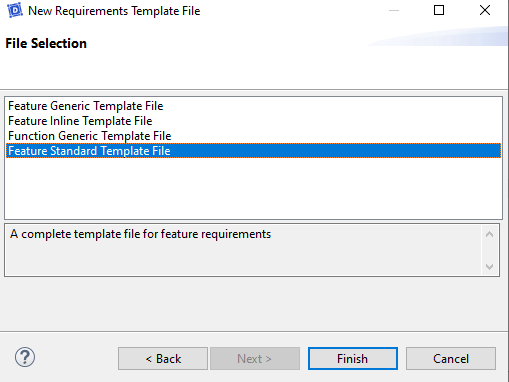
- Click on Finish
The file should be finally created in you workspace and an editor opened. This is the editor to do changes on requirement templates.
Below, we will rebuild the beginning of this demonstration template.
MAKE YOUR OWN TEMPLATE
Create the template file
A wizard is available to create the requirement template file. To open it, proceed as follow :
-
Click on File > New > Other...
-
In category Example EMF Model Creation Wizards, Select RequirementTemplate Model
-
Select the container project (e.g RequirementGeneration that you just created).
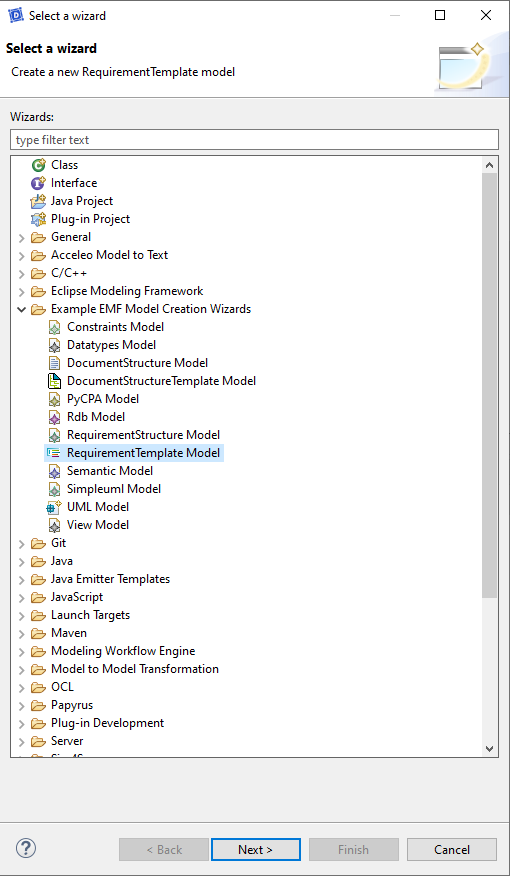
-
Click on Next
-
Select the container project (e.g RequirementGeneration that you just created).
-
Name the file to create. The extension should be .reqst.

-
Click on Next
-
Select text Requirement Template as Model Object and UTF-8 as encoding.
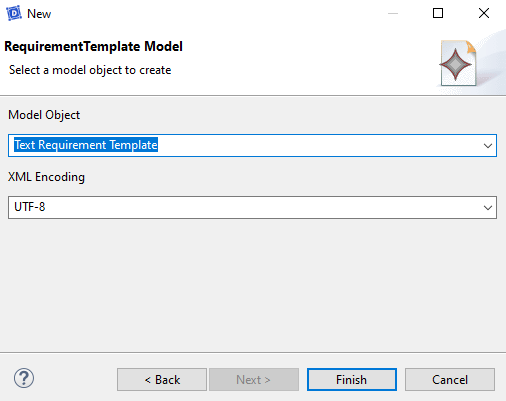
- Click on Finish

You should get an empty template with a Text Requirement Template as single element.
Get a relevant example
First, you need to understand how a requirement template works. Its aim is to make the bridge between a set of model elements and a requirement as text. Beyond the first item of the template, you will find root elements which indicate the model elements which will produce a requirement. Then the text is composed by translating the element of the template into words. Sometimes, it's only the addition of a transition word, sometimes a model element name is used.
This available root elements are :
- The transitions
- The states
- The constraints (only for performances)
For this tutorial, we will focus on building a requirement template to generate text from a transition. In order to make a tutorial with a reasonnable size, we will focus on the translation of a certain kind of transition and we will take as example the transition produced by the sequence diagram internal with one activity and one condition in the use case internal of the service first service.
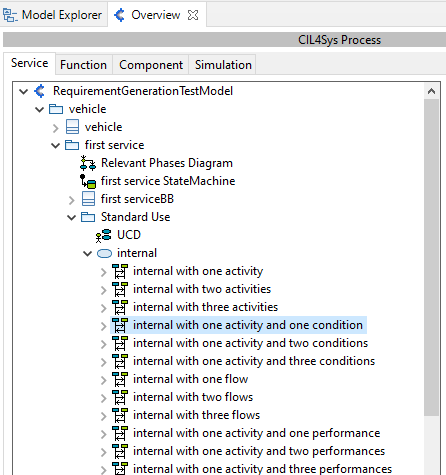
The sequence diagram used is given as reminder here :

We can note some points about this diagram :
- When this sequence diagram is translated into a piece of state machine, it gives an internal transition because there is no state transition.
- There is a trigger makes a request to do something
- The source lifeline of the trigger is named through the name of an actor the operator
- There is one condition
- There is one activity
- There is no performance on the activity
- There is no flow as effect.
Fill the template
Fill the configuration fields of the template
Firstly, we have to give some information about our template.
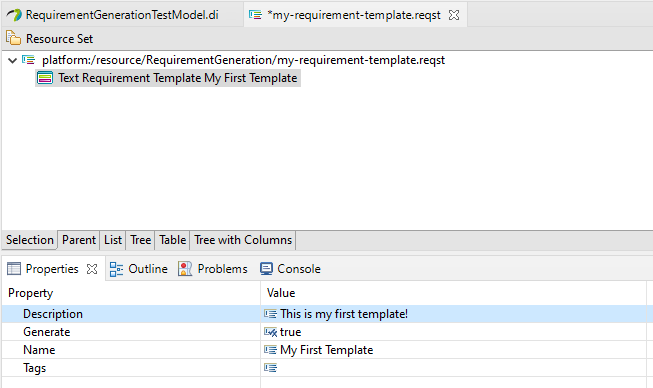
- Select the root item Text Requirement Template
- Open the properties view if it's not
- Name your new template thanks to the field name
- Add a description to your template thanks to the field description
Fill the structure of the transition text
Now we can fill the template to match the format of the requirement derived from the sequence diagram which we took as example.
To create a starting element item:
- Right-Click on the Text Requirement Template item
- Click on New Child > Root Transition
The process to create an item is always the same :
- Right-Click > New Child to create an item below the current item
- Richt-Click > New Sibling to create an item at the same level
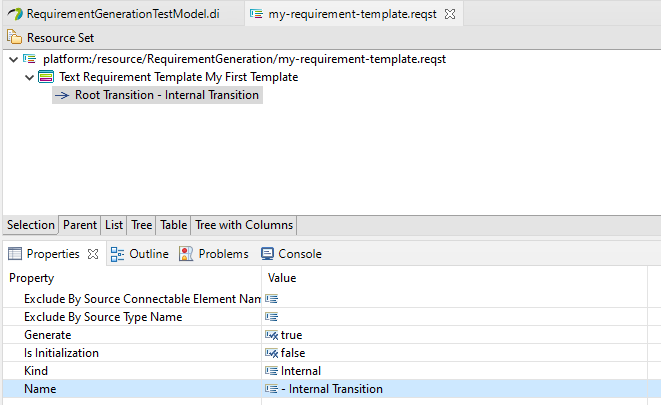
The fields beginning with Exclude enable to not use this item to generate a requirement for particular requirement. Refer to the detailed documentation for more information. We just will set the fields Kind and Name
- Set Kind field with Internal
- Set Name field with the name of you choice, this will appear in the editor and enable to find quickly an item of the template.
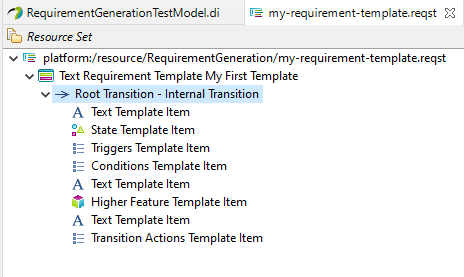
Then, you can fill the content of the requirement text. This will be read from top to bottom. Proceed as follow :
- Create a Text Template Item
- Edit the field Text to contain the text : "In state ". The given text will be introduced to start the requirement text. Don't forget the space after the word "state".
- Create a State Template Item
- Edit the field State Kind to be : INITIAL. This will replace this element by the name of the initial state.
- Create a Triggers Template Item. This element will be completed later.
- Create a Conditions Template Item. This element will be completed later.
- Create a Text Template Item
- Edit the field Text to contain the text : "the ".
- Create a Higher Feature Template Item. This element enable to introduce the name of the product in a requirement.
- Create a Text Template Item
- Edit the field Text to contain the text : " shall ".
- Create a Transition Actions Template Item. This element will be completed later.
You should obtain the following template at this step.
When editing a requirement template, it's a good practise to check regularly the result through the demonstration model. To use your template, put it into the project where you want to use it if it's not. Don't forget to save your template.

Then, you just have to generate the requirements:
Select first service in the overview, then click on Generate Requirements.
Then select your requirement template:
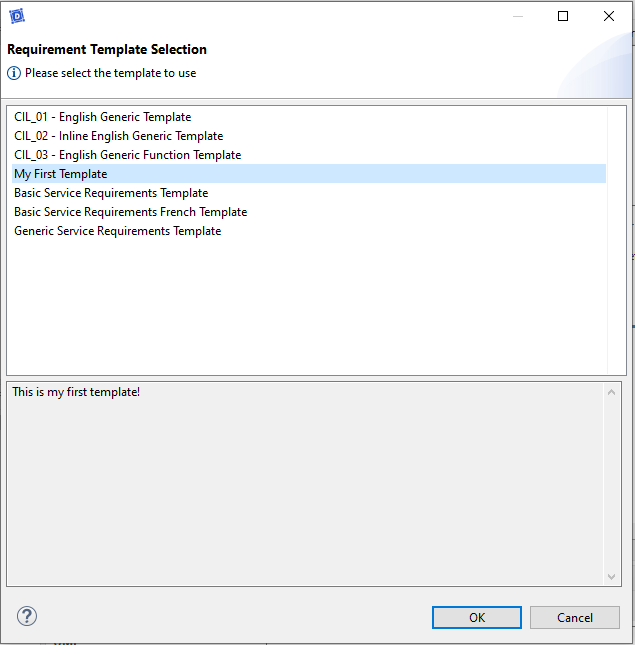
If you check the Properties of the requirement in first service > first service_Requirements > REQ-first service-3-1 corresponding to the diagram internal with one condition and one activity, you should get a text like :
"In state State Athe vehicle shall "
Some important elements are missing here :
- The trigger,
- The condition,
- The effects
And indeed, this corresponds to the elements we passed during the first step.
For each of the elements Triggers Template Item, Conditions Template Item and Transition Actions Template Item, you can refer to other elements of the template in order to describe how the part of the requirement corresponding to the trigger, the conditions or the actions should be translated in text.
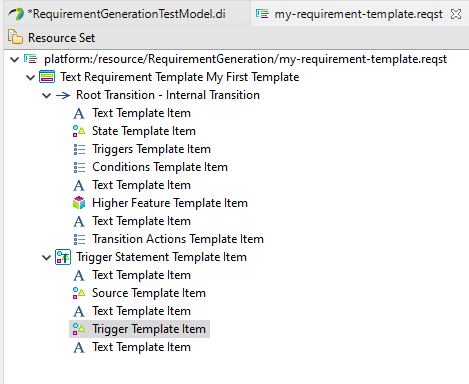
Fill the structure of a trigger statement
- Create a Trigger Statement Template Item under your Text Requirement Template
- Edit the field Filter to contain : ALL. This template item will be used for any trigger.
Under this new item:
- Create a Text Template Item
- Edit the field Text to contain the text : ", when ".
- Create a Source Template Item
- Edit the field Field To Use to be : REPRESENTED_ELEMENT_NAME. This will replace this element by the name of the represented element name.
- Create a Text Template Item
- Edit the field Text to contain the text : " " (one space).
- Create a Trigger Template Item
- Edit the field Applied Styles to be : REMOVE_UNDERSCORE. This will replace this element by the name trigger and will remove undersocres if needed.
- Create a Text Template Item
- Edit the field Text to contain the text : " " (one space).
Fill the structure of a condition statement
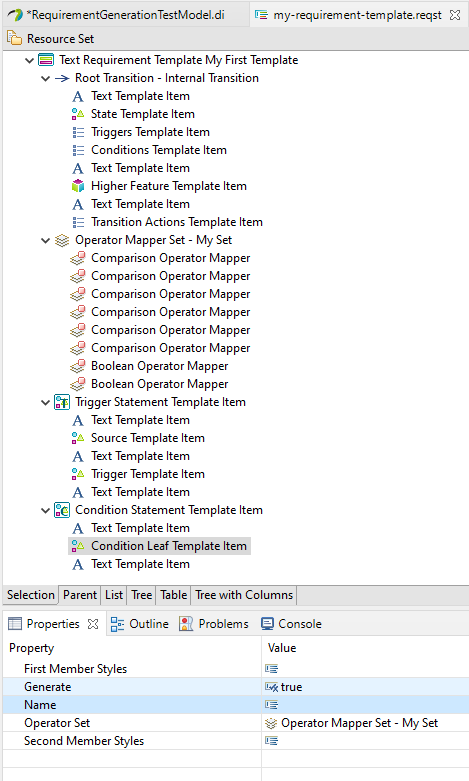
- Create a Condition Statement Template Item under your Text Requirement Template
- Edit the field Filter to contain : SINGLE. This template item will be used when a requirement contains one single condition.
Under this new item:
- Create a Text Template Item
- Edit the field Text to contain the text : "and if ".
- Create a Condition Leaf Template Item
- Create a Text Template Item
- Edit the field Text to contain the text : " " (one space).
For the condition leaf template item, you'll have to set an Operator Mapper Set. This element is used to give the correspondance between an operator (for comparison or boolean) and its text.
To do that, you have to :
- Create a Operator Mapper Set under your Text Requirement Template
- Set Name field with the name "- my set"
Under this new item:
- Create 6 Comparison Operator Mapper
- Create 2 Boolean Operator Mapper
For each Comparison Operator Mapper, you have to chose an Operator Kind and an associated Text. For each Boolean Operator Mapper, you have to chose an Operator Kind and its associated Text. The following tables displays the element configuration that you have to set. The text should be set without quote.
| Number | Operator Mapper | Operator Kind | Text |
|---|---|---|---|
| 1 | Comparison | GREATER | " is greater than " |
| 2 | Comparison | LOWER | " is lower than " |
| 3 | Comparison | GREATER_OR_EQUAL_TO | " is greater than or equal to " |
| 4 | Comparison | LOWER_OR_EQUAL_TO | " is lower than or equal to " |
| 5 | Comparison | EQUAL_TO | " is equal to " |
| 6 | Comparison | DIFFERENT_FROM | " is different from " |
| 7 | Boolean | AND | " and " |
| 8 | Boolean | OR | " or " |
When it's done, you can make reference to this mapper in the field Operator Set of the element Condition Leaf Template Item that you just created.
Fill the structure of an action statement
- Create a Action Statement Template Item under your Text Requirement Template
- Edit the field Filter to contain : SINGLE. This template item will be used when a requirement contains one single action.
Under this new item:
- Create a Action Leaf Template Item
- Edit the field Applied Styles to be : REMOVE_UNDERSCORE. This will replace this element by the name trigger and will remove undersocres if needed.
- Create a Text Template Item
- Edit the field Text to contain the text : ".".
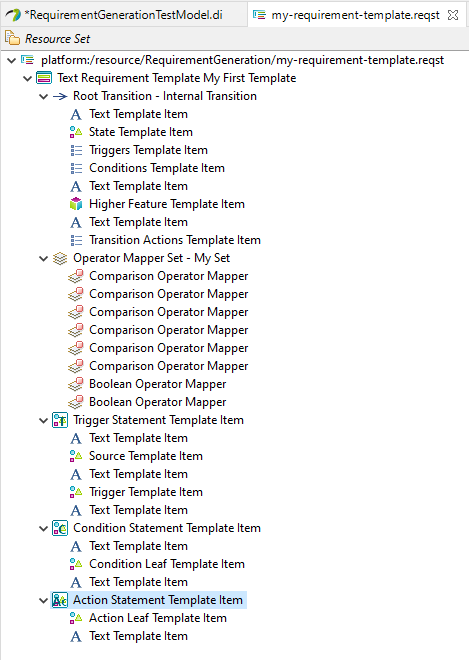
In this statement, you can add Arguments Template Item and Performances Template Item to manage respectively arguments of an action (as a flow) and performances (attached to an activity for example).
Reuse your statements in the main template
Then we just have to reuse the statement that we just defined.
- Set the field Trigger Statement Template Items to contain the Trigger Statement Template Item which you created.
- Set the field Condition Statement Template Items to contain the Condition Statement Template Item which you created.
- Set the field Action Statement Template Items to contain the Action Statement Template Item which you created.
For the demonstration requirements, you should get the following text :
In state State A, when the operator makes a request to do something and if foo is lower than makes_a_request_to_do_something_value the vehicle shall do something.
You will see that other demonstration requirement are not well formed. The art to build a good requirement template is to manage all eventualities. But now, you know the basics and all the mechanisms to create you own requirement template.