How to use a clock flow for time-based calculations
PRESENTATION
Prerequisites
- Have done the tutorial Start to use Sim4Sys with a simple model (blackbox),
- Have a look at the Initilization parameters of a scenario and Definition of Clock flow sections.
- Have a look at the Hour Display page.
Skills that you will acquire
In this tutorial, you will learn how to use the clock flow available in Virtual Bench in order for your model to measure time and act accordingly. More precisely, you will increment a clock in Virtual Bench using the model.
Duration
0h45
Designer Papyrus
Create a new model Clock, with a Project How_to_use_Clock_Flow and a service ClockService. Add a new Standard life phase and a new See what time it is use case.
You will need a flow to the environment:
- display_clock communicates with the Virtual Bench Hour Display element. It conveys, through the decimal value parameter of the flow, the number of seconds elapsed since 00:00:00. The element then automatically presents the corresponding hour based on this information.
You will need two flows coming from the engineer:
- clock_flow which your model will receive at regular intervals.
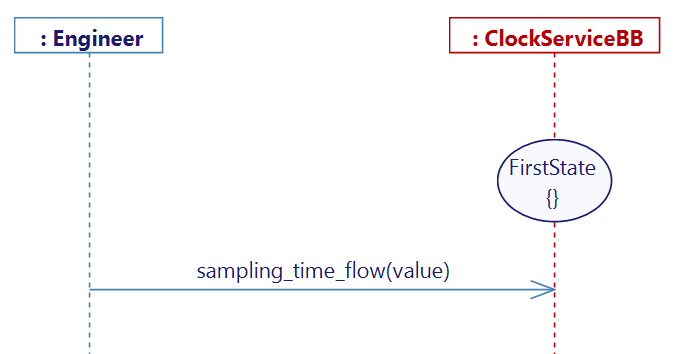
- sampling_time_flow is sent at the beginning of the scenario, encapsulating an integer value that signifies the time interval between two clock_flow flows, with a default time interval of 40 ms.
In the use case that you have created, add two user stories:
- Initialization
We will retrieve the 'time interval' value at the beginning of the simulation
- Update_clock
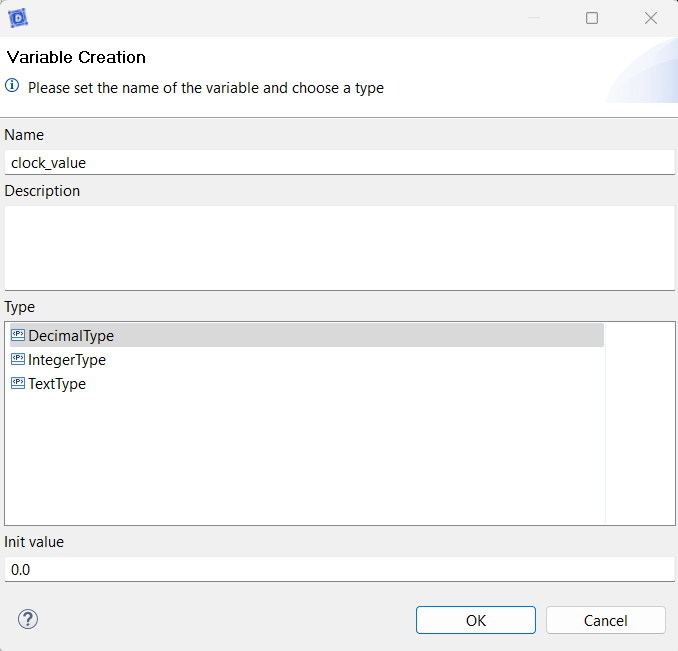
For this user story, it's necessary to establish a variable that will track the current state of the clock. This variable, named clock_value, will be a decimal storing the number of seconds elapsed since the beginning of the scenario, initialized to 0.0.
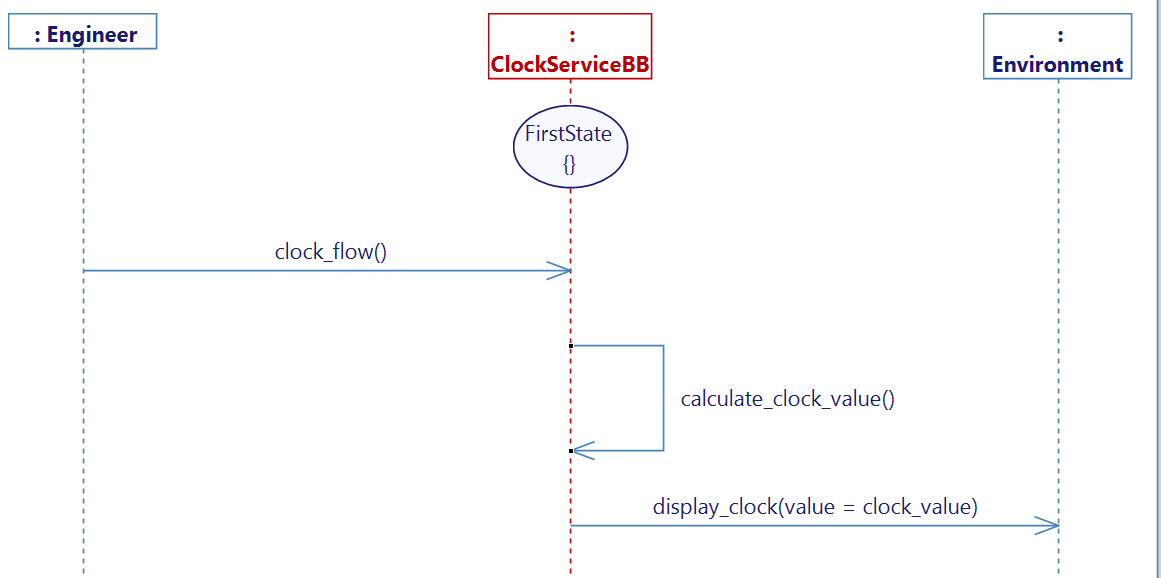
We will incorporate our input flow, clock_flow. Upon receiving this flow, the model recognizes that a specific duration has passed, as determined in the preceding sequence diagram, Initialized. Subsequently, we must implement an internal activity named calculate_clock_value to update the clock_value variable within our model.
clock_value += sampling_time_flow_value / 1000.0;
sampling_time_flow_value is an integer value in ms.
clock_value is a decimal value in s.
Upon receiving the flow, we need to increment the clock_value by the sampling_time_flow_value amount of time, applying the necessary conversion.
It is crucial to use 1000.0 instead of 1000 to ensure that the division result is interpreted as a decimal rather than an integer, preventing rounding errors and ensuring accuracy.
After completing the calculation, we can transmit the value to the Virtual Bench using the display_clock flow by passing the clock_value as a parameter.
After completing these steps, generate the state machine, build the project, and export the XML.
Virtual Bench
In your project, create a new executable for your Clock model and import the previously generated XML. Create a new scenario and add the relevant websocket in the Scenario tab.
In Edit Mode, open an HMI context, and look for the Hour Display element. Drag and Drop the element into the scenario.
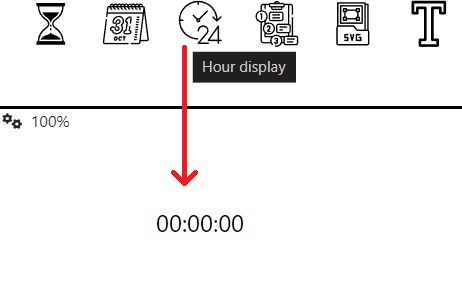
If the element is not visible in the top bar, right-click on your context icon to access the Configure Context options. Within the Elements section, expand and select the Hour Display element if it has not been selected. If you cannot locate the element, ensure that your current context is set to an HMI context.
Initialize the Hour Display at 00:00:00.
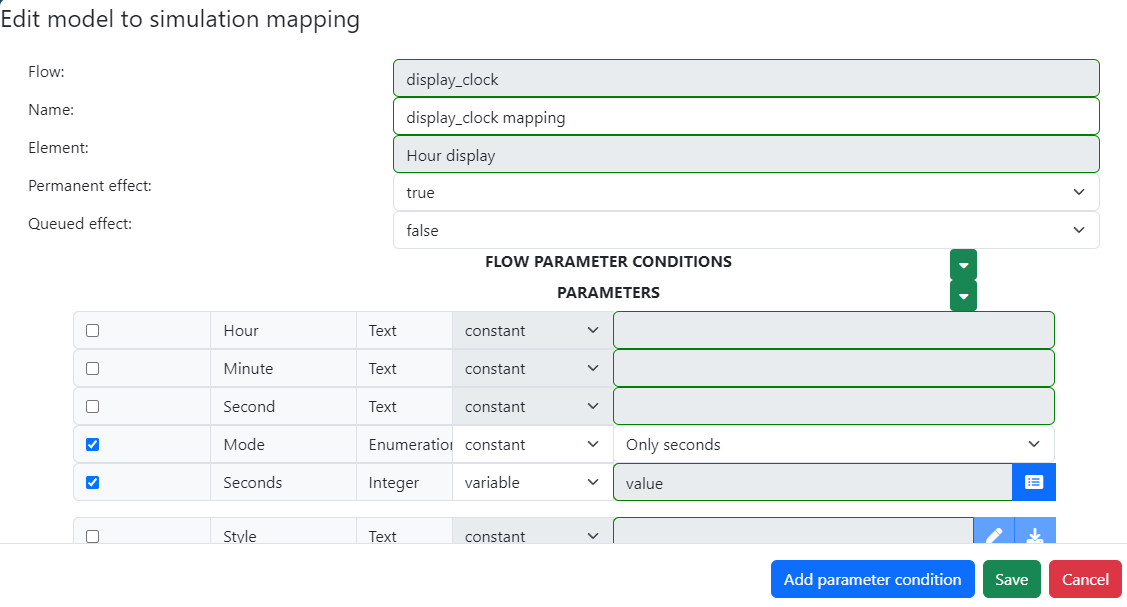
While in edit mode, establish and incorporate a Flows Received type mapping on the Hour Display element. This mapping should switch the clock to the Only Seconds mode, as opposed to the Hour Minute Second mode. Additionally, map the received value to the Seconds parameter of the element to display the clock's value.
To conclude, it's essential to configure the WebSocket settings. Right-click on the WebSocket button located at the top right of your scenario and choose Configure WebSocket. In the configuration window, locate the Clock flow parameter. Select clock_flow from the drop-down menu to enable Virtual Bench to transmit this flow at each step. The final parameter is the Sampling time flow. Opt for sampling_time_flow from the drop-down menu to enable Virtual Bench to convey the number of milliseconds between each Clock flow to the model.
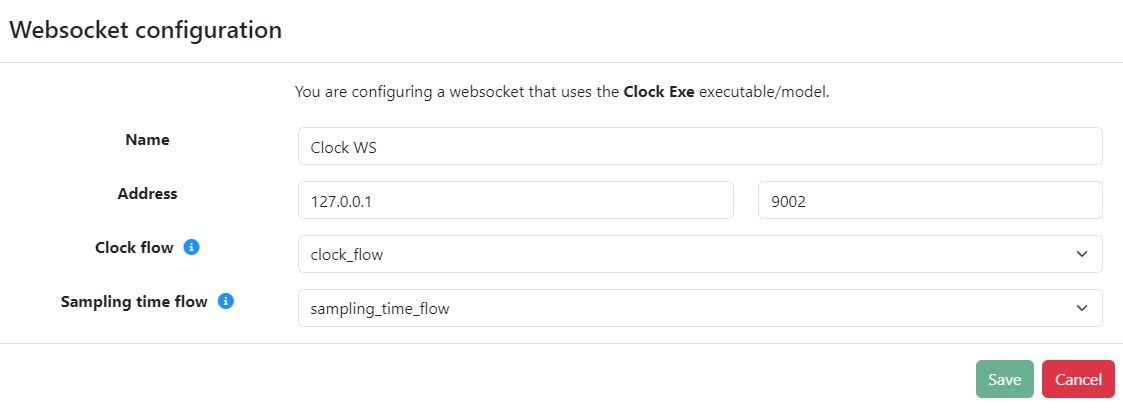
You can specify the sampling time value in your scenario by accessing your scenario parameters; by default the value is set to 0.04 seconds.
Run
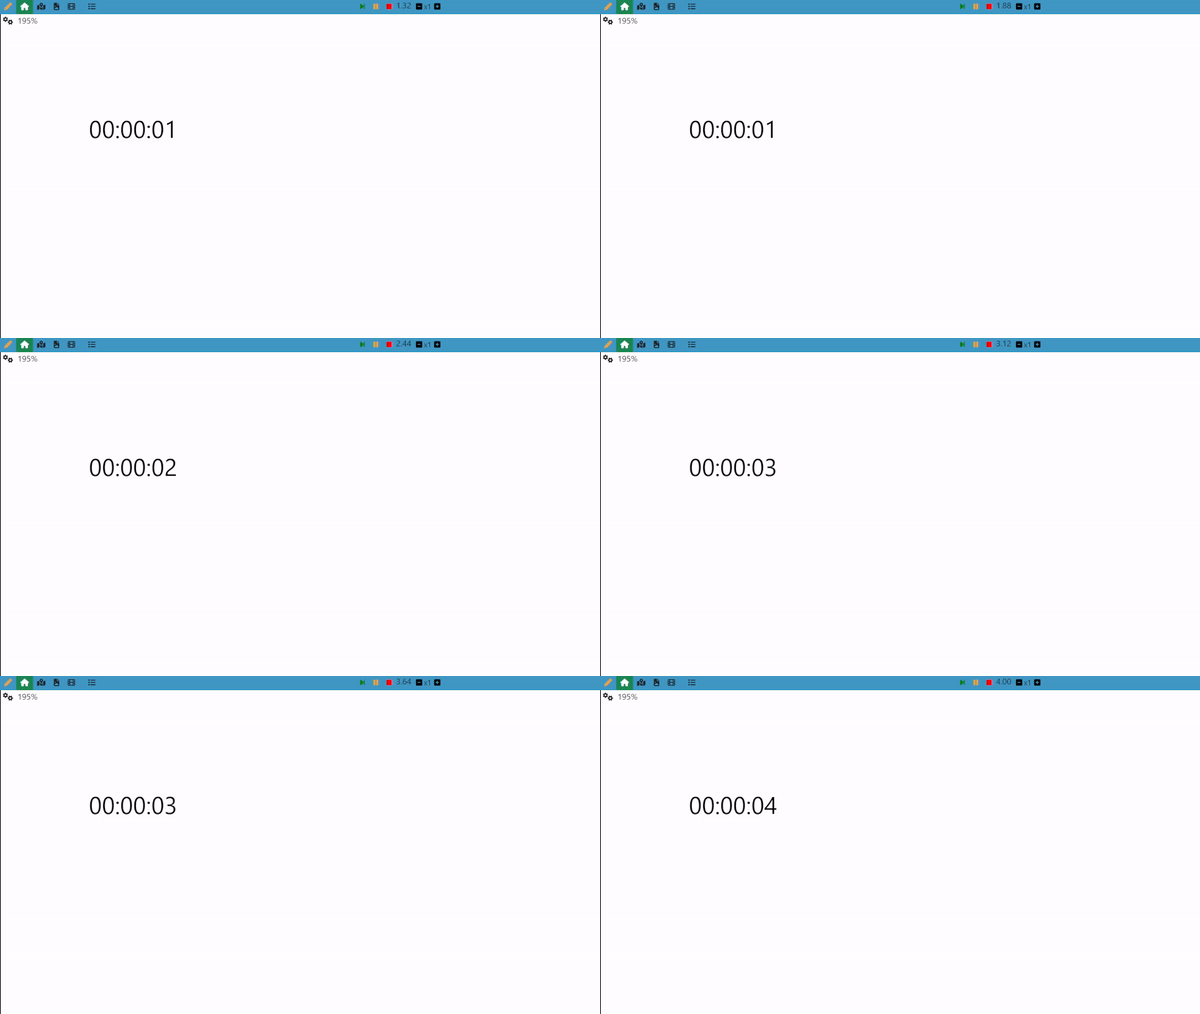
Exit Edit mode in Virtual Bench, launch your executable, and establish a connection via the WebSocket. Run the scenario, and the clock should start incrementing.
Agile method
To enhance the model, we can simply get the number of seconds already setup in Edit Mode at the beginning of scenario, and keep track of the elapsed time, starting from this point. One straightforward approach is to create the following User Story:
- Receive_a_new_clock_value
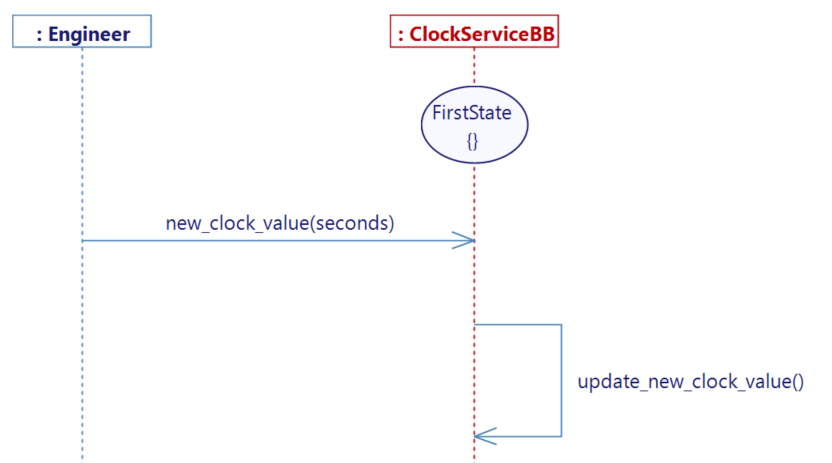
The activity only involves replacing the default value with the new one:
clock_value = new_clock_value_seconds;
In Virtual Bench, after importing the new XML, the previously used Hour Display can now hold a new mapping (of type Send flow), in which the initial value of seconds set in Edit Mode can be sent at initialization:


After generating, building the new project, and updating the Seconds parameter of the Hour Display in Edit Mode, you can test your scenario. In the following example, an initial value of 55000 seconds has been set:
Implementation update
To go further, you can try to use a Time Input element to dynamically change the input value while the scenario is running. This element does not allow to send a raw "Seconds" value to the model but only distinct "hourField", "minuteField", "secondField" values. You will then have to change the previously created trigger for it to take three parameters instead of one. The value that keeps track of the time will then have to be calculated from the three parameters of the flow:
clock_value = new_clock_value_seconds + new_clock_value_minutes * 60 + new_clock_value_hours * 60 * 60;
The mapping shall be updated accordingly. Be sure to select the "On Changed" event so that the model gets updated every time the user change the value while the scenario is running.