Scenario Configuration and Customization
Overview
You will be able to access the Edit mode of a scenario in the following cases:
- You created the scenario.
- You didn't create the scenario but you are the project owner. In this case, you will only be able to view the parameters associated with each element, without any possibility of edition.
Contexts
Definition
Scenarios are modifiable through Contexts, which offer different perspectives on the visualized environment. Elements can be added to these contexts by dragging and dropping them from a menu.
The contexts are specifically tailored for the scenario that is currently open.

There exist four main types of contexts:
- Scene 2D: Provides a top-down view of the ground, available once per scenario.
- Scene 3D: Offers a three-dimensional perspective based on the Scene 2D, also limited to one per scenario.
- Timeline: Displays a chronological sequence of actions undertaken by users, the environment, and engineers, with one timeline per scenario.
- HMI (Human-Machine Interface): Showcases the HMI components.
To start editing the scenario, the user must click the "Run mode" button. Upon entering edit mode, both the edit button and the currently active context button will highlight in orange:
While in edit mode, users can switch between contexts for editing by left-clicking on the desired context:
Main context
The main context, which is showcased in the main window, is highlighted in green.
To designate a context as the 'main context', simply right-click on the context button and select 'Define as main context'.
Secondary contexts
Beyond the main context, secondary contexts are accessible by clicking on their respective icons, which opens a separate page for the chosen context. It's worth mentioning that double-clicking on any of these icons will automatically launch all pages of secondary contexts that contain at least one element.
Be aware that using Chrome may experience slowdowns if a secondary context is in focus.
Elements
Upon activating "edition mode," a right-side panel becomes visible, featuring three tabs:
-
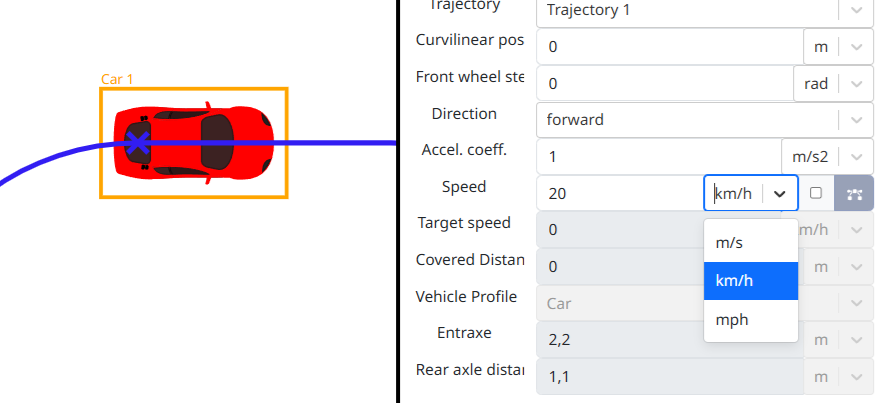
Parameter: This tab displays the parameters of the element selected within the scenario. Within each applicable parameters, it is possible to change the unit used.
-
Mapping: Here, you'll find the mapping instances tied to the selected scenario element. Within this tab, there's the capability to eliminate multiple mapping instances related to the chosen element.
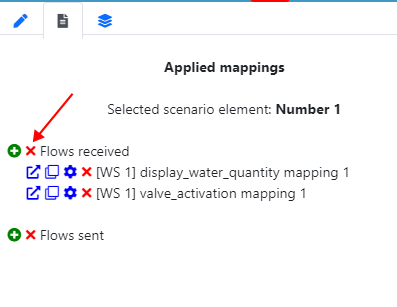
This allows for the concurrent removal of numerous mapping instances.

-
Selection: This tab enables you to select a particular scenario element and center the display on it.
Additionally, within the Selection tab, you have the option to modify the layer of the selected element, moving it closer to the foreground or further into the background.
Definition
Elements, which are either objects or actions, can be introduced into a scenario's contexts through drag and drop.
The availability of elements varies across different menus, contingent on the context in question.
When an element is placed within a Context and "edition mode" is activated, selecting an element allows for its modification. The right lateral view will exhibit all of its parameters, whether they are editable or not.
Reset values
Once you save a new value for a parameter, you have the option to revert to the default value by clicking on the designated button

Save
Following a modification, the field will turn green. Click on "Save" to confirm your changes.
You can select multiple elements by pressing "Ctrl" and clicking on the desired elements. The selected elements can be deleted by pressing the "Del" key.
Delete
To delete an element, you can use the “Delete” option found in the context menu, or simply press the “Del” key. A confirmation prompt will appear to ensure the action is intentional before the element is completely removed.
Scenario Parameters
Initialization of the scenario
The values are communicated to the model at the start of the scenario.
Within the scenario tab:
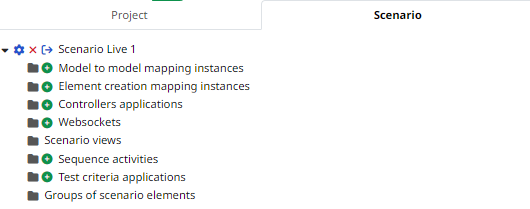
You can access the scenario parameters pop-up by left-clicking on "Edit scenario parameters":

This pop-up facilitates the modification of scenario parameters:
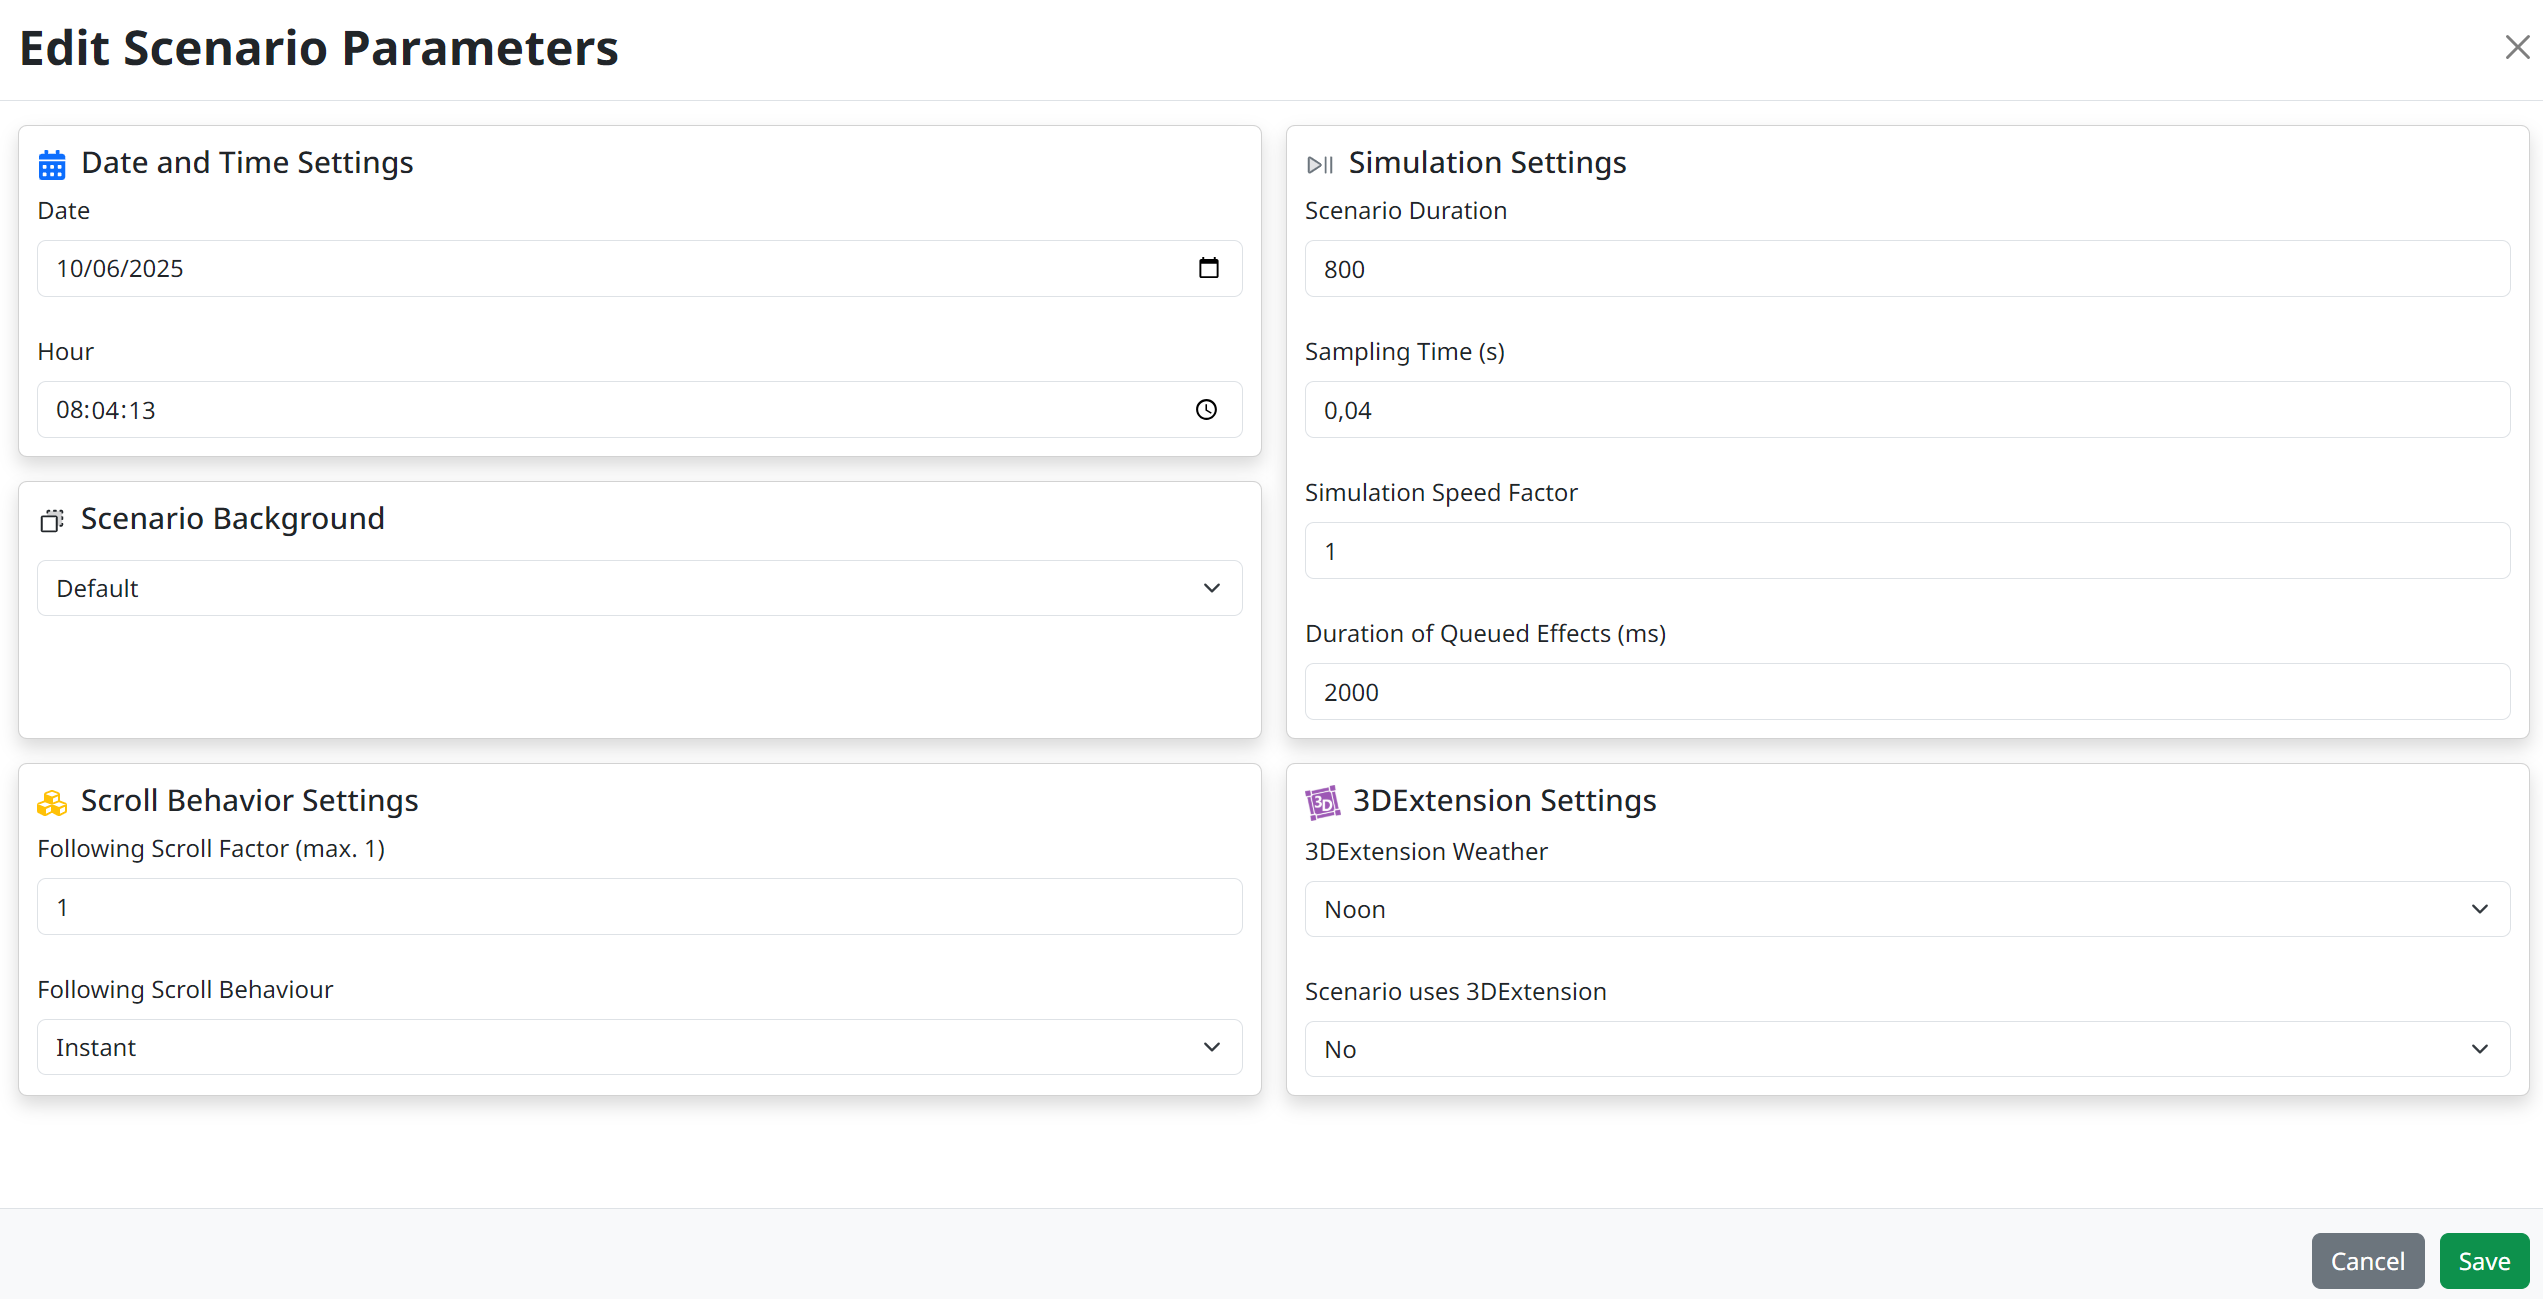
It's possible to adjust the following parameters:
| Parameter | Default | Description |
|---|---|---|
| Date (DD:MM:YYYY) | The date of the scenario creation. | Represents the initial date for the scenario. |
| Hour (HH:MM:SS) | The hour of the scenario creation. | Specifies the starting time for the scenario. |
| Scenario Duration (s) | 800 s | Defines the total length of the scenario in seconds. (minimum equal to Sampling time) |
| Sampling time (s) | 0.04 s | Indicates the interval between consecutive visualization updates. (minimum = 0.01s) |
| Speed Factor (no unit) | 1 | Determines the visualization's speed. A value of 1 implies real-time speed, less than 1 for slower, and greater than 1 for faster execution. (min = 0) |
| Duration of queued effects (ms) | 2000 ms | For temporary mappings, it specifies how long an effect lasts before reverting to the element's original state. For queued mappings, this duration separates the application of each effect during runtime. (min = 0) |
| Following scroll factor | 1 | Refresh rate for the 2D view when auto-tracking an object. A value of 1 updates every frame, lower values reduce the refresh frequency. (min = 0) |
| Following scroll behaviour | Instant | The method of tracking an object in the 2D scene: either an immediate update or a smooth, gradual follow. |
| 3DExtension Weather | Noon | Offers the ability to set the weather conditions within the 3D view of the 3DExtension tool. |
| Scenario background | Default | Allows selection of the desired ground type for the 2D and 3D scenes. |
To ensure optimal performance throughout the scenario, it is recommended to maintain a consistent ratio of 25 (Hz) between the speed factor and the sampling time.
Scenario Views
Within this tier of the tree structure, you'll find a compilation of all context elements that you've dragged and dropped:
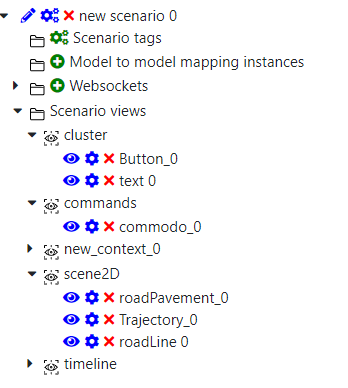
You have several actions at your disposal:
- Center on an element within the main context by clicking the "View" button:

- Open the "Side View" window, which displays the element's parameters, by clicking the "Edit" button:

- Delete the element by selecting the "Delete" button:

Scenario Elements Type
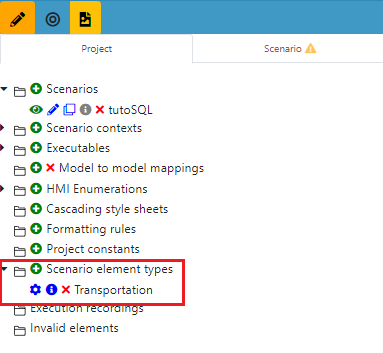
You have the option to establish a scenario element type, facilitating the organization of elements into a distinct subgroup.
Check scenario elements
Within the Project tab, you're able to review the types of scenario elements:
Creation of a Scenario element type
- Navigate to the Project tab and click on
next to Scenario element types.
- Enter your desired name for the element type and click on Save.

Delete a Scenario element type
In the Project tab, proceed to the scenario element type and click on  .
.
If the element is not utilized within the project, it will be removed immediately.

However, if the element is in use, you'll encounter the following window, prompting you to remove all associations with the scenario element type before proceeding.

Remove the elements associations to the scenatio element type
- Click on
 adjacent to the type you intend to delete. This action will display a list of elements associated with this type:

- Right-click on each associated element, then select Edit types. Deselect the associated type and click on Save:

- Afterwards, click on
 next to the type you wish to remove. Confirm the deletion in the following window by clicking on Ok:

Associate a scenario element type to an element
- Navigate to an HMI or 2D Scene and right-click on the element you wish to associate with a scenario element type, then select Edit type.
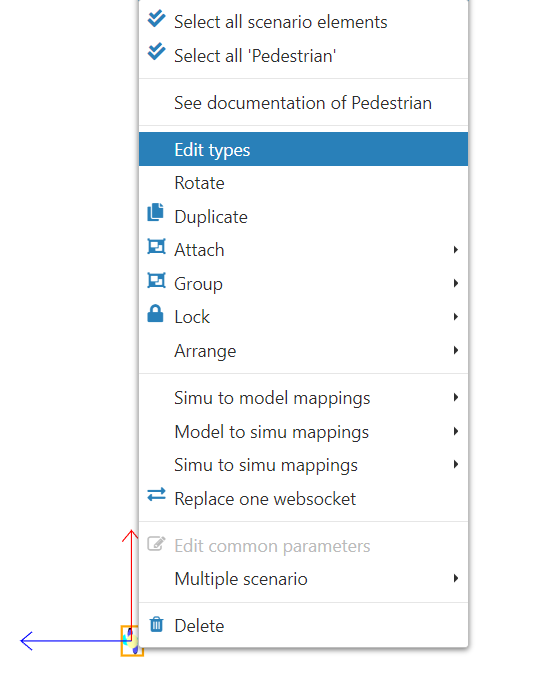
- A window for selecting the target type will appear. Choose the type you want to associate with the element and click on Save.
