Working with Scenarios
This page explains how to create, configure, and manage environments, HMI enumerations, reusable CSS styles, and test criteria at the project level.
All of the information on this page refers to the Project Resources modal:


Scenario Environments
Adding a New Environment
Creating new environments for your scenarios enhances the project's flexibility, as each environment is accessible from any scenario in the project. Note that the HMI context is an exception, since it can be created multiple times. To create a new environment, go to the "Environments" tab in the Resources modal and click "+ New".
- When creating an environment, you must select its type. Remember that HMI contexts are the only type that can be added multiple times.
- Choose a unique name for your environment and avoid names that already exist in the project.

Upon creation, the new environment appears in the scenario environments list:

Modifying an Environment
To alter an environment, simply click on (edit icon) on the right side of the modal.
This action grants you access to the environment's configuration settings:

Name, Icon
You can change your environment's icon and name to make your project and scenarios easier to use and organize.
Dimensions
Here, you can define the dimensions of the environment and its grid. If an element is positioned at the environment's edge, it will appear truncated. To expand the workspace, simply adjust the "X maximum:" and "Y maximum:" fields. The grid dimension defines the movement step for all elements in the environment, which helps align elements (e.g., in 10px increments).
HMI Enumerations
Add a new HMI Enumeration
HMI Enumerations, which are utilized across the entire project, are listed here. To introduce a new HMI Enumeration, select the "HMI enumerations" tab in the Resources modal, and click on the "+ New" button: 
The creation and customization of your new enumeration are facilitated through the following pop-up:

The features available for managing your HMI enumeration include:
- Renaming the HMI enumeration,
- Renaming the states,
- Assigning an SVG to each state and previewing it in the list of states,
- Reusing a saved SVG from the library:
- Adding another state by clicking the "Add state" button:

- Removing a state by clicking on:
- Saving the HMI enumeration,
- Cancelling the creation or modification of the HMI enumeration.
Once created, the new HMI enumeration is displayed in the HMI enumeration list:

For each HMI enumeration, you can:
- Edit the enumeration by clicking on
- Delete the enumeration by clicking on
Editing an HMI Enumeration
To edit an HMI enumeration, simply click on (edit icon). This action will opens the enumeration manager pop-up, allowing you to make changes:
See above for details on what you can do in this manager.
Deleting an HMI Enumeration
Deleting an HMI enumeration is initiated by clicking on (delete icon). A confirmation modal will open:

Enter the required value in the input and click the Delete button to confirm.
Cascading Style Sheets
If you find yourself frequently using a particular style or wish to preserve a style for future use, you have the option to save your CSS (Cascading Style Sheets) within the system for later retrieval.
To save a new CSS style, click on the “+ New” button , and the following pop-up will appear:
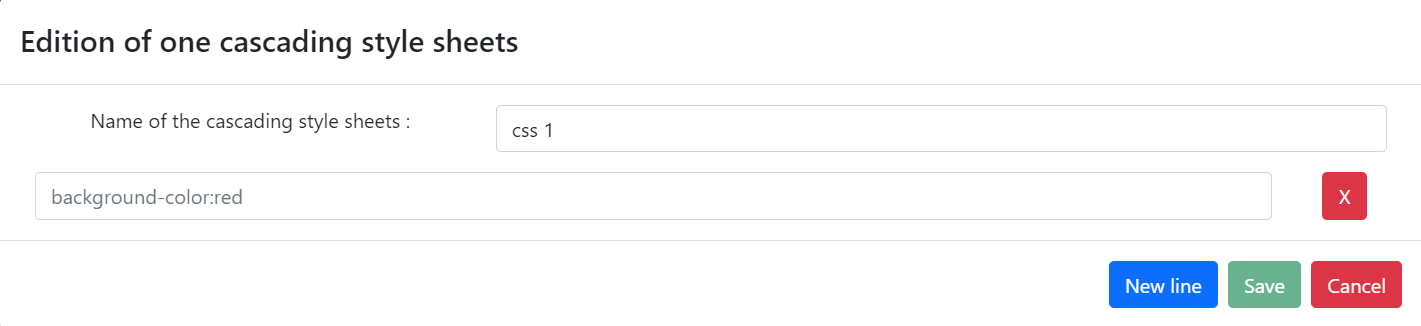
When naming your CSS, ensure it is distinctive to avoid duplicates.
You can choose which type of scenario elements this style applies to. Note that only a limited set of scenario elements can be styled with CSS.
Write your CSS code in the editor. You can preview the result below.
Learn more about CSS in the MDN documentation.
Example:

Some properties are already set by scenario element parameters (e.g., background-color for the Background element). Don't forget to add the "!important" flag if you need to override them. When applicable, you will see this message:

More information about this flag is available on the MDN documentation
After customizing your CSS, click "Save" to store it. Your saved styles will appear in the CSS list in the Styles tab:

Styles are specific to a scenario element type, they can be accessed and used across the project. For example, a class defined for buttons can be used on each button of the project, but not on other types of scenario elements.
To modify an existing CSS style, click on (edit icon) on the right side of the modal.
To delete a CSS style, click on (delete icon).
Be mindful that changes to a CSS will apply retroactively to elements that were using its previous iteration.
Application to an element
In this illustration, we'll demonstrate how to apply a pre-saved style to a button within a scenario.
To use a previously saved CSS, click on in the Display Parameters section of the selected button.

In the modal that opens, you will be prompted to choose a CSS style:

When you click the CSS class you want to apply to the selected button, the Class name field will be automatically populated.

Here's an example with "css_1":

If you want to fine-tune the style of the selected scenario element, you can use the Style field.
This process provides a flexible and efficient way to apply consistent styling across different elements of your scenario without altering the base styles stored within your project's CSS library.
Test Criteria
In your project, you can define test criteria to ensure it meets specific constraints and that values obtained during visualization runs match expected outcomes.
A test criterion compares two operands.
To create a new test criterion, click on the "+ New" button: , which opens the following modal:

Additionally, you can:
- Rename the test criterion for clarity and organization,
- Define the first and second operands by choosing a basic elements, a project constant, or a literal constant. After selecting an element, specify a parameter,
- If applicable to the parameter, specify a unit,
- Select an appropriate operator for the comparison,
- Save the test criterion to store it within your project,
- Cancel the creation or modification of the test criterion if needed.
This feature helps maintain the integrity and accuracy of your project's visualizations, enabling validation of conditions and outcomes against predefined criteria.